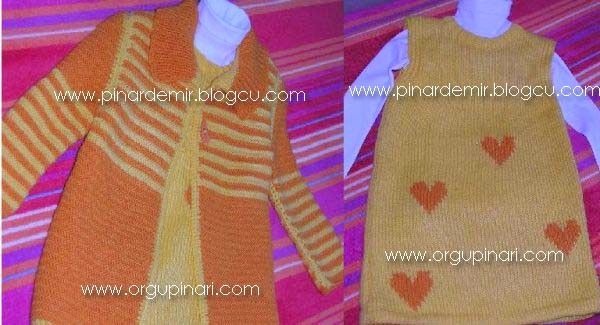
This gorgeous cardigan, with its striking herringbone pattern, is a perfect project for creating a handmade gift that’s both stylish and cozy for a child. Don’t be intimidated by the pattern; the instructions are straightforward once you know the basics.
Let’s get started on this special piece!
Materials & Gauge
- Yarn: A medium-weight yarn is recommended.
- Needles: The yarn label will suggest a size, likely around US 6 or 7 (4-4.5mm).
- Gauge: To ensure the cardigan fits, knit a small swatch in the herringbone pattern. Measure how many stitches and rows you get per 4 inches (10cm). Adjust your needle size if needed.
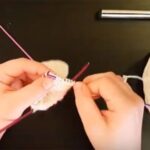
Note: A video for the herringbone pattern is linked below the post to help you get started!
Video: herringbone pattern of orgupinari.com
Knitting Instructions
Back Piece
- Cast on 80 stitches.
- Work in the herringbone pattern until the piece measures 40 cm from the cast-on edge.
- Shape the Armholes: At the beginning of the next 3 rows, bind off 3 stitches, then 2 stitches, then 1 stitch.
- Continue knitting in pattern until the armhole measures 16 cm high.
- Shape the Collar: On the next row, bind off the center 12 stitches.
- Work the left side of the collar first. On the next three rows, bind off 3 stitches, then 2 stitches, then 1 stitch at the collar edge.
- Shape the Shoulder: On the next two rows, bind off 8 stitches at the armhole edge. Then, bind off all remaining stitches.
- Rejoin the yarn to the right side of the collar and repeat the process for the other shoulder.
Front Pieces (Make 2)
- Cast on 45 stitches.
- Work in the herringbone pattern for the same length as the back piece until it reaches 40 cm.
- Shape the Armhole: Follow the same armhole shaping as the back piece.
- Shape the Collar: After the armhole is complete and the piece measures 12 cm from the armhole edge, begin to shape the collar.
- On the next six rows, bind off stitches at the collar edge as follows: 5, 3, 2, 1, 1, 1.
- Shape the Shoulder: After the collar shaping is complete, bind off the remaining stitches for the shoulder.
Collar
- Using your needles, pick up stitches evenly around the entire collar opening of the cardigan.
- Work in a 1×1 rib stitch (knit 1, purl 1) for 12 cm.
- Increase 1 stitch on each side of the collar opening every few rows to create a gentle curve.
- Bind off all stitches in rib.
Finishing
- Block the pieces: Gently stretch and pin each piece of the cardigan between moist towels. Leave them to dry for a few hours.
- Seam the pieces: Using a crochet hook or a needle, seam the shoulder and side seams together.