Hello dear knitting enthusiasts!
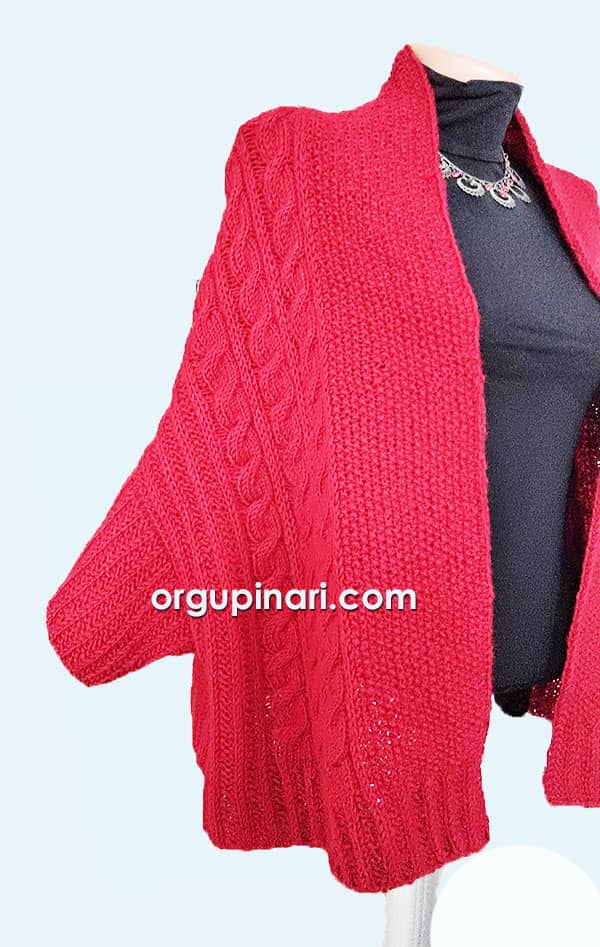
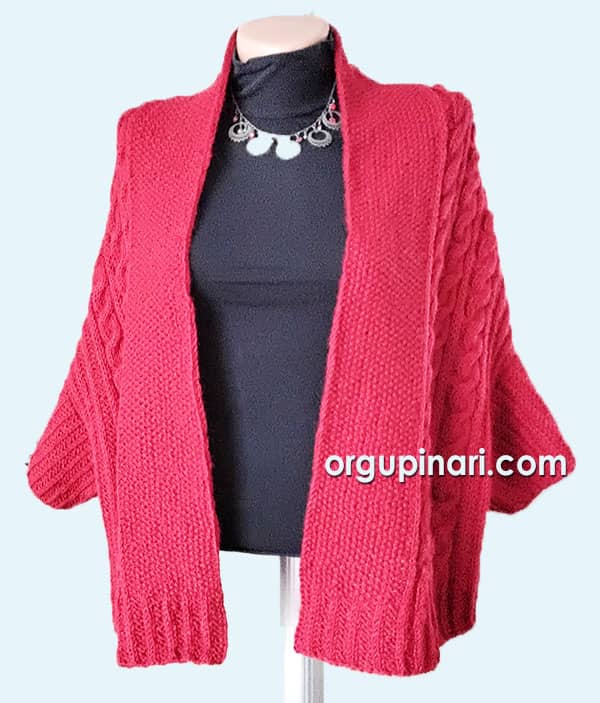
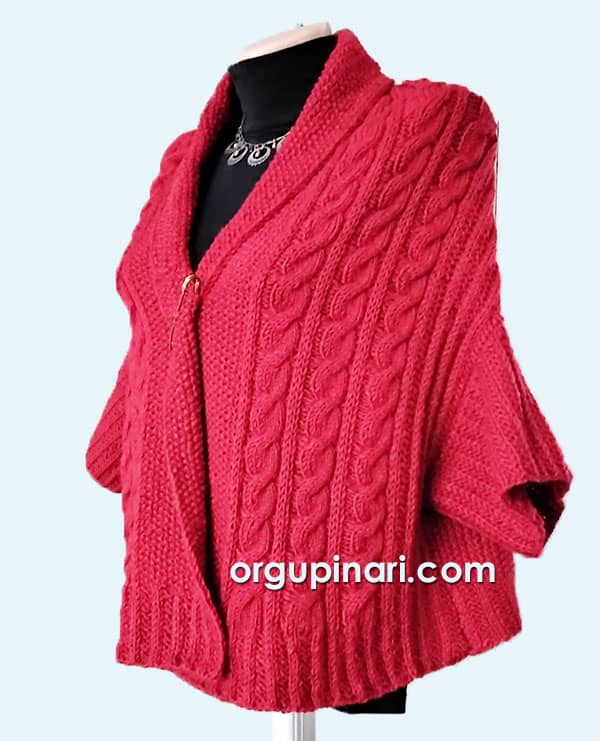
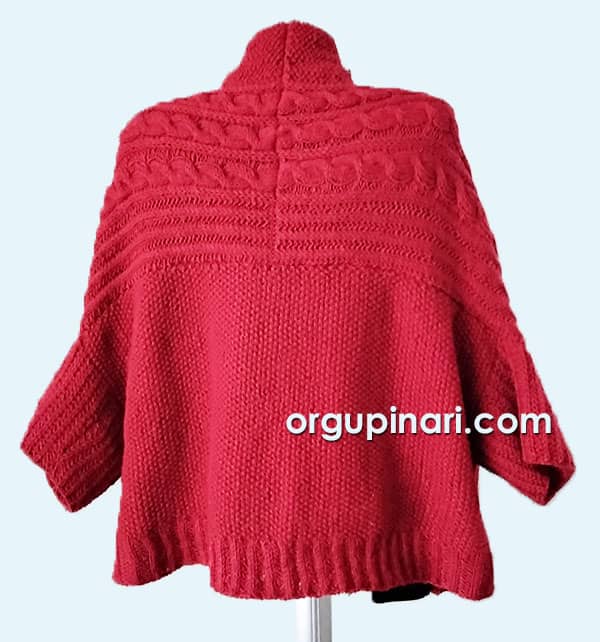
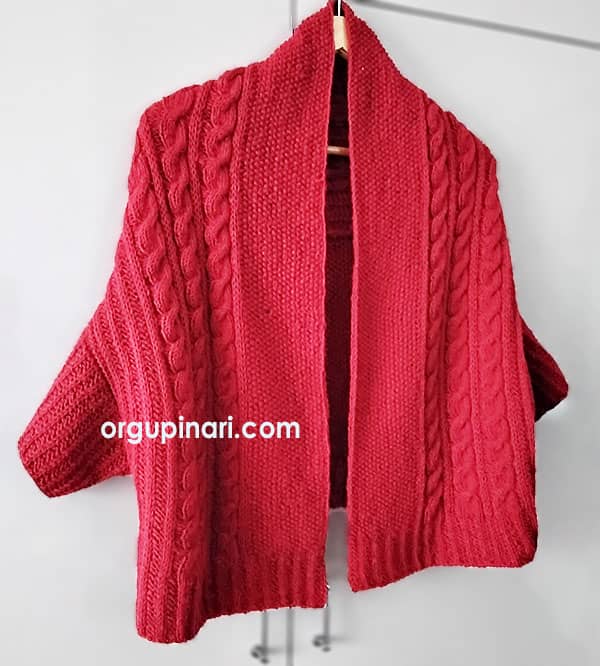
I’ve come to Örgü Pınarı (Knitting Spring) with a design I’ve long anticipated, one with high energy that defies winter: The Red Shawl Cardigan!
This cardigan not only protects you from the cold but also draws all eyes to you the moment you put it on. The design perfectly aligns with today’s comfortable and stylish fashion trend. Its oversized fit, dropped shoulder, and wide sleeves make it stand out.
But what makes it so special? It’s undoubtedly the voluminous cable knit pattern and the shawl collar that gently wraps the neck.
If you too want to add a glamorous yet comfortable piece to your winter wardrobe that provides both warmth and passion, prepare your needles.
Here are all the details and step-by-step instructions for this magnificent cardigan.
1. The Model’s Basic Design
When creating this design, I aimed to combine the classic cardigan form with a modern and loose silhouette. The basic features are:
-
Style: Oversize and draped.
-
Sleeve Type: Dropped shoulder cut, providing a relaxed fit.
-
Collar: Shawl Collar, ensuring a cozy look.
-
Main Pattern: I used a simple seed stitch for the body.
-
Focal Point: All attention is on the Cable Knit pattern.
Note: The cable knit pattern needs to be more prominent. For this reason, use a slightly thicker and sturdier yarn.
2. Materials You Need
-
Yarn Type: 25% wool, 75% acrylic
-
Yarn Quantity: 500 gr
-
Needle Size: 5 mm knitting needles
-
Auxiliary Materials: Wool needle, cable needle, long circular needle for the sleeves.
3. Knitting Instructions: Step-by-Step Guide
The cardigan consists of 3 main pieces. We will knit the pieces first, then assemble them.
A. Back Panel
-
Cast On: Cast on 124 stitches. This is approximately 70 cm in width.
-
Ribbing: Knit 15 rows of 2 purl, 2 knit ribbing. This will be approximately 5 cm in length.
-
Main Body: Start with the simple seed stitch (1 knit, 1 purl).
-
Finishing: When the fabric length (including the ribbing) reaches 36 cm in height, bind off all stitches at once.
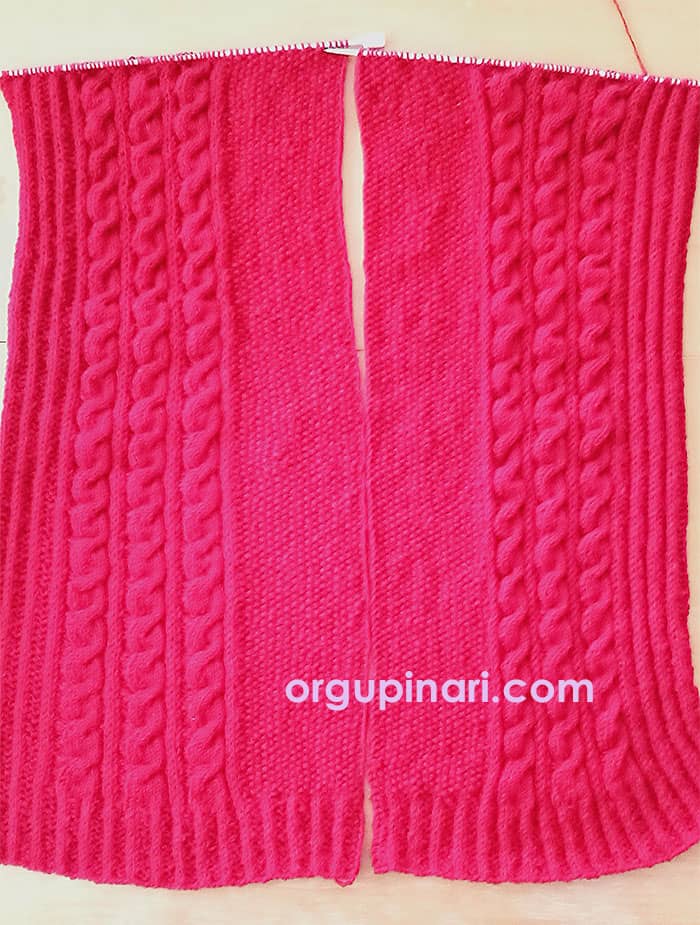
B. Front Panels
-
Cast On: Cast on 68 stitches. This is approximately 37 cm in width.
-
Ribbing: Knit 15 rows of 2 purl, 2 knit ribbing. This will be approximately 5 cm in length.
-
Main Body: For the collar edge, knit 18 stitches in seed stitch, then repeat the instructions inside the quotation marks three times: “2 knit stitches, 2 purl stitches, 6 knit stitches,” knit the remaining stitches 2 knit, 2 purl until the end of the row. Every 10 rows, twist the 6 knit stitches inside the quotation marks 3-3 (cable).
-
Finishing: When the fabric length reaches 76 cm, bind off all stitches at once.
Knit 2 of these pieces.
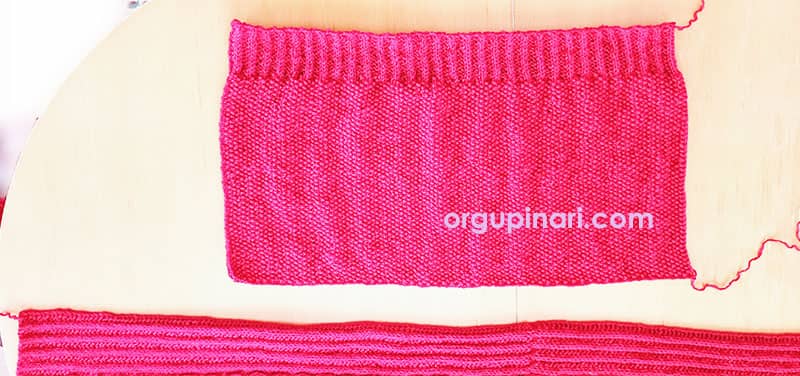
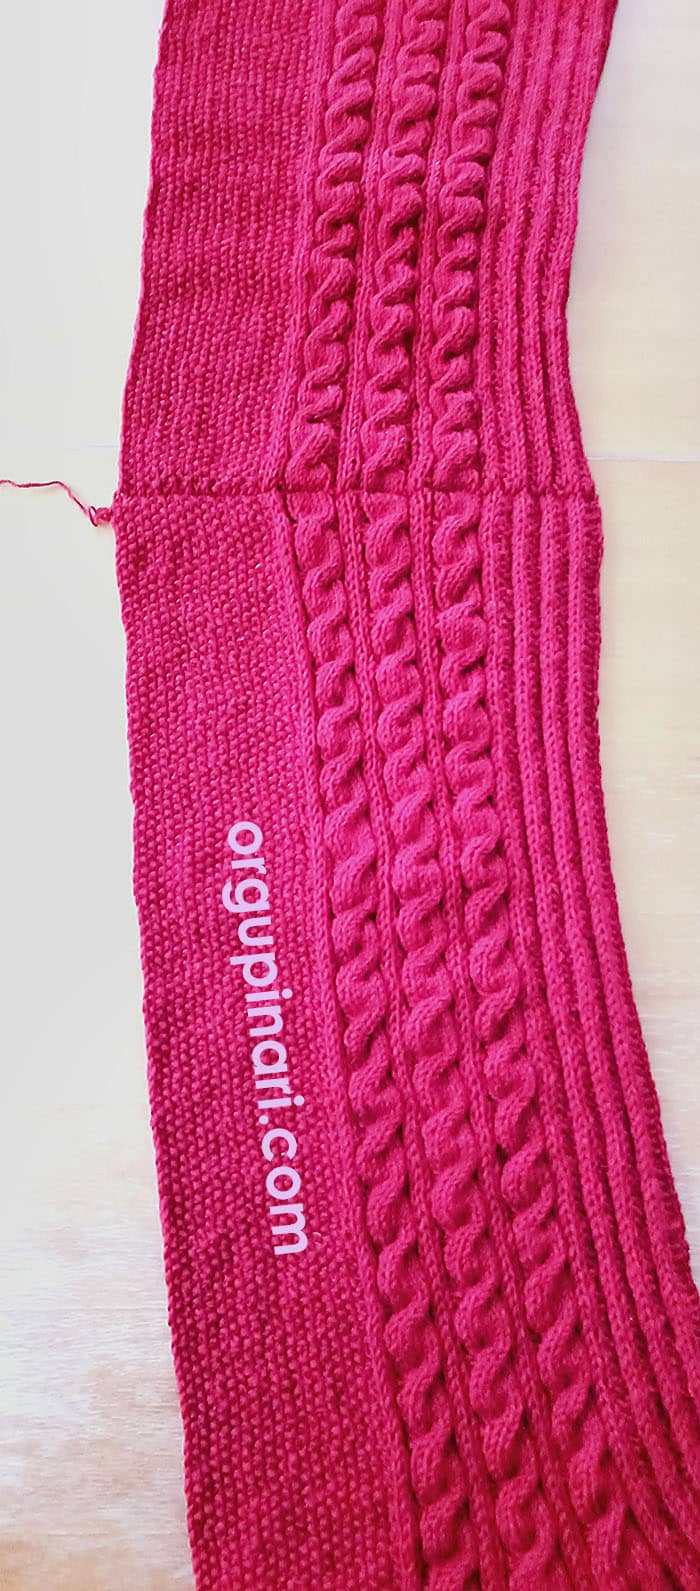
C. Assembly and Sleeve Construction
-
Seaming: Join the two front pieces at their finished edges as shown in the photo below.
-
Leave a 20 cm gap for the sleeve and complete the side seam.
-
Pick up stitches from the sleeve opening. Knit 1 purl, 2 knit for a height of 12 cm.
Styling and Final Touches
-
Blocking Process: Shape the knitting with steam upon completion. This step is critical. Dampen the cardigan or use a steam iron from a distance. This settles the stitches and clarifies the cable pattern.
Outfit Ideas:
-
It pairs perfectly, especially with a black turtleneck and dark-colored trousers.
-
Alternatively, it can be used open to achieve an elegant shawl look.

GIPHY App Key not set. Please check settings